I'm sharing some details and tips on my personal wedding process, hoping it will help future DIY brides:
1. Before you plan anything, create a mood board
Back in September of 2012, the first thing I forced myself to do was create a mood board for my wedding that would guide all the decisions I made moving forward. The mood board consisted of images and adjectives that captured the vibe, attitude and look and feel of the wedding. At that time I had just watched two movies Like Crazy and Celeste and Jesse Forever which took place in Los Angeles and inspired the laid-back, surfer/skater, minimalist route. Also, our budgets were tight so "simple" and "clean" felt like a good decision.
2. Figure out your budget and make a list of priorities
According to theknot.com the average American wedding in 2012 cost $28,427. My recommendation is to do some research with vendors in your wedding location to make an intelligent guest but be honest with yourself and your partner about what is a comfortable number.
Once you decide on a budget, prioritize what is important to you. These were our priorities:
- Venue - We wanted outdoor, views, space, water but no sand
- Photographer - We wanted beautiful, un-posed pictures
- Alcohol - Open bar, the whole time
These were less important:
- Dress - I just needed to look nice
- Flowers - Our venue was a ranch so ornate flower arrangements wasn't necessary
- Food - Catering outdoors is always tough so we accepted that we weren't going to get restaurant/bistro quality food
3. Choose your wedding colors
I uploaded my mood board to a tool on kuler.adobe.com and selected the colors that went well together. I avoided green, even though it's my favorite color, because I knew the venue would be lush with grass and trees.
4. Secure your venue and send your Save the Dates
Since I live in New York, the only opportunity to visit venues was in December when I went home to Hawaii to visit my family. I had a hunch I wanted to have my wedding at Sunset Ranch from the photos I had seen on its Facebook page and when I went for a site visit, I instantly knew this was the right place. The next day, I emailed my guests a Save the Date, giving them 7 months lead time.
6. Maximize use of your wedding website
I spent a lot of time thinking about how I wanted to visualize and tell our story on our wedding website seanandzeny.com and decided on a chronological visual slideshow that allowed people to scroll and see how we grew up together as a couple. My awesome friend Dmitriy developed the site to be responsive for table and mobile so it displays beautifully on any screen. I used the site for my RSVPs to save money on stamps and printing and to house wedding details and engagement photos.
7. Create secret boards on Pinterest
This is a no brainer but the downside is you can only create 3 secret boards of your own. One of my bridesmaids shared her secret Pinterest board with me so I could see what dresses and shoes she was selecting.
8. Choose common colors for bridesmaid dresses
I found a beautiful rose arrangement on Pinterest and wanted my bridesmaids to find dresses in those hues; however, not everyone had an easy time finding their color due to the shade being out of season or just too uncommon, so I had to adjust two of the shades (Ruchy and Melodee's). See below for the initial photo I sent with their shade assignments:
Final bridesmaid dresses below:
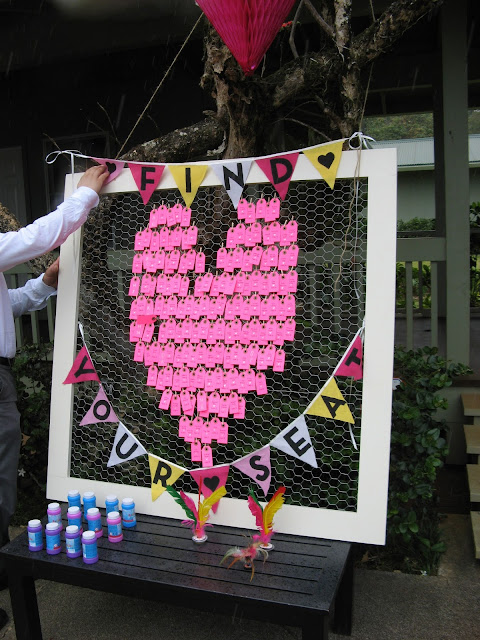
9. DIY decorations aren't always cheaper but it does make it more personal
I started serious wedding planning in late January but didn't actually execute any of the decorations until 2-3 months before the wedding. The reasoning is DIY takes a lot of time, specifically preparation, delegation and sourcing materials. With work and a life, it's tough to find time to cut, glue, trace, etc. so I had many friends and family who graciously offered to help me make flags, flower arrangements and favors.
My favorite wedding blogs for inspiration are: Green Wedding Shoes, Style Me Pretty, Rock My Wedding and Snippet and Ink; however, I recommend brainstorming on ways to make things personal to you and your partner to add a special touch and don't forget to reference the MOOD BOARD.
Two weeks before the wedding, I sketched all the decorations and sent it to my mom and aunt to execute on the day of. They did an amazing job bringing my vision to life and I'm so grateful for everyone who helped set up.
*My brother made these amazing light-up "Z" and "S" letters
My close high school friend Jenn bakes as a hobby and I knew I wanted her to make my wedding cake, so I sent her a few photos I found online...
And she created this beyond amazing ombre pink two-tier cake! Thank you Jenn!
10. Dopplegangers help with hair and makeup
I couldn't decide on my hair and makeup because I was torn as to what would look good on me and the options were infinite--hair up? hair down? So I googled "Jamie Chung" who I've often been told I look like (I don't see the resemblance) and it helped me make a decision to do my hair down curled with a side part. Thanks Jamie!
11. The small details matter
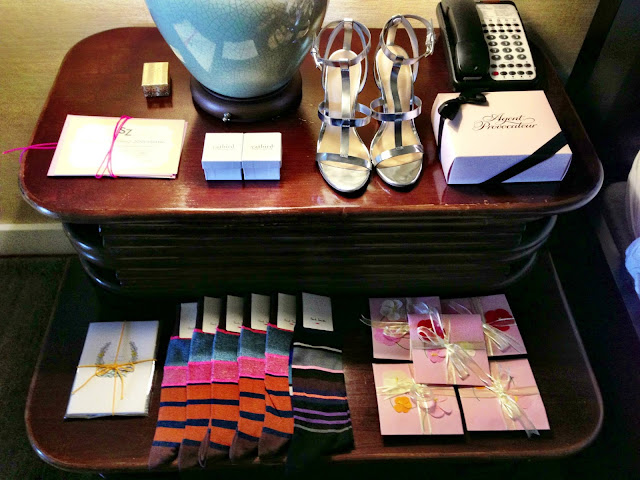
No matter what it is you need to buy--the weddings bands, groomsmen socks, bridesmaid gifts, garter, heels--make sure it stays true to your mood board and vision or at minimum reflects you and your partner. Weddings aren't cheap so every dollar spent should be worthwhile.
The last piece of advice is to expect the unexpected. It rained heavily on my wedding, my cake melted, the vases kept falling off the tables and I stained the entire bottom of my dress--but nevertheless, it was the best day ever thanks to all my friends and family who joined me to celebrate. All the effort and work the last 7 months has been worth it.


.jpg)


